

As great as Elementor is for building amazing websites, its not without its fair share of setbacks. Not being able to adjust the spacing between and after list items is one of them. Fortunately, there’s an easy fix which only requires a few lines of CSS.
Let me show you how its done.
Here’s the Quick Fix
Copy and paste this code into the “Additional CSS” section of your website.
/* This code adds 30px of bottom margin to the end of bulltet point lists */
.elementor-widget text-editor ul, .elementor-widget-theme-post-content ul {
margin-bottom:30px;
}

/* This code adds 30px of bottom margin to the end of numbered lists */
.elementor-widget text-editor ol, .elementor-widget-theme-post-content ol {
margin-bottom:30px;
}

/* This code adds 10px of spacing between list items in a bullet point list */
.elementor-widget text-editor ul li, .elementor-widget-theme-post-content ul li {
margin-bottom:10px;
}

/* This code adds 10px of spacing between list items in a numbered list */
.elementor-widget text-editor ol li, .elementor-widget-theme-post-content ol li {
margin-bottom:10px;
}
Understanding the Problem
By default, Elementor doesn’t apply any margin or padding at the bottom of list items. So unless you like what comes after your list sitting uncomfortably close to the bottom of it, this is a problem.
Despite Elementor’s extensive customization options, which allow us to control things like link colors, paragraph spacing, and typography settings for headings, it surprisingly doesn’t offer a built-in feature to control list spacing. This results in your content looking like this:
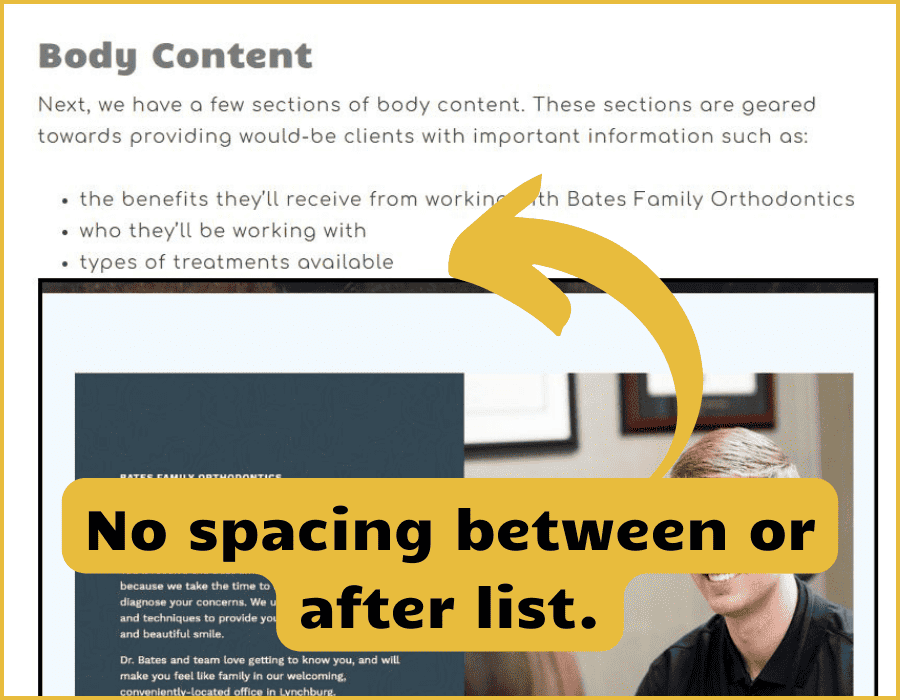
Doesn’t look good, does it? In this scenario the image butts right up to the bottom of the list. It’ll do the same thing with paragraphs, headings, or anything else that comes after it.
Enough complaining, lets move on to the solution.
How to Resolve the Issue
In order to resolve this issue all we need to do is add a bit of CSS. We’ll be addressing the spacing between and after both bullet point lists (ul) and numbered lists (ol).
To keep things simple, we’ll keep all the CSS separate so we can see what CSS addresses which problem.
Add Spacing to Bottom of Bullet Point Lists (ul)
The following CSS adds 30px of bottom margin to your bullet point lists.
.elementor-widget text-editor ul, .elementor-widget-theme-post-content ul {
margin-bottom:30px;
}
Add Spacing Between Bullet Point List Items (ul)
The following CSS adds 10px of bottom margin to each item within your bullet point lists.
.elementor-widget text-editor ul li, .elementor-widget-theme-post-content ul li {
margin-bottom:10px;
}
Add Spacing to Bottom of Numbered Lists (ol)
The following CSS adds 30px of bottom margin to your numbered lists.
.elementor-widget text-editor ol, .elementor-widget-theme-post-content ol {
margin-bottom:30px;
}
Add Spacing Between Numbered List Items (ol)
The following CSS adds 10px of bottom margin to each item within your numbered lists.
.elementor-widget text-editor ol li, .elementor-widget-theme-post-content ol li {
margin-bottom:10px;
}
Using the same example from above, this is what your list will look like after adding this CSS:
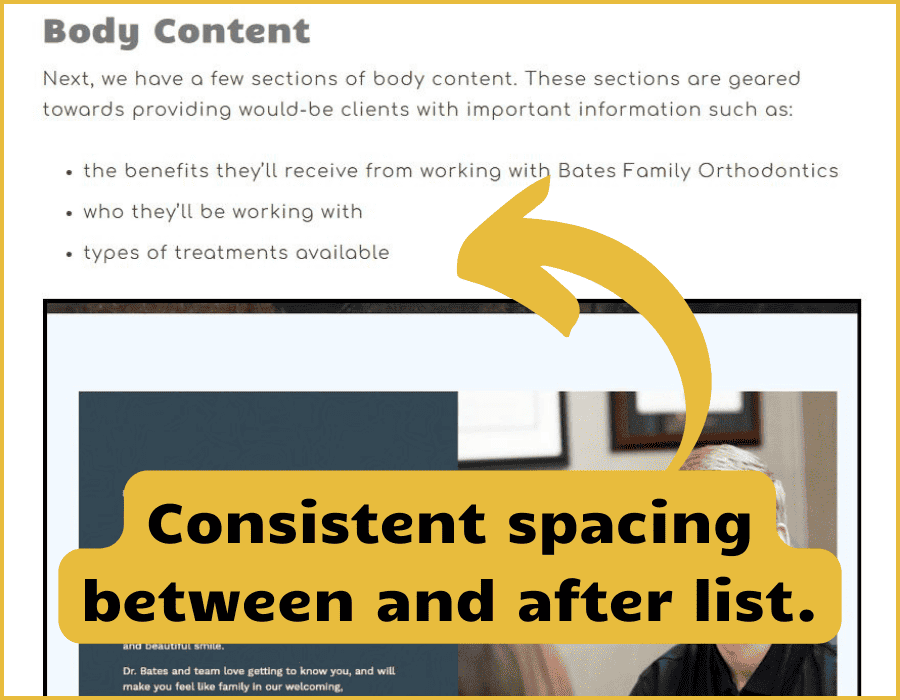
Much better. We now have consistent spacing between the list items themselves and between the bottom of the list and the next element.
Understanding This CSS
As you can see we’ve used the following class selectors in our CSS:
- .elementor-widget text-editor
- .elementor-widget-theme-post-content
Doing this keeps the spacing contained to list items only within the Elementor text widget and post content widget. If we were to add this CSS without these class selectors, then it could effect other areas of our websites such as the menu, which is technically a ul (unordered list).
The ul and ol elements seen within our CSS represent bullet point lists and numbered lists respectively. We’ve customized both types of lists here for the sake of consistency throughout the site. However, if you only need to address the spacing of a single type of list, feel free to leave out the CSS you don’t need.
The li element within our CSS represents list items, or individual items found within the list. We target this element specifically in order to adjust the spacing between individual list items.
Final Thoughts
While there are some other ways to address the spacing issues of lists within Elementor, this one seems to be the most practical. Compared to other techniques that require you to modify your list every time you use one, this method is a “set it and forget it” solution, needing to be done just once.
I’m sure Elementor will address this issue at some point but for now we have an easy solution that only requires a few minutes of time and very basic understanding of CSS.
If you have any questions feel free to reach out in the comments below!

